A well-organized digital photography workflow allows you to work with digital images more effectively, from selecting the best shooting mode to publishing photos online.
If you have a well-thought-out workflow, it will make your work easier and more effective.
Those who are just learning the ropes in digital photography, need to establish the right routine.
Even people with loads of experience can improve their skills by optimizing their workflow.
On This Page
Select the Right Shooting Mode
If you take photos in a studio and need to prepare them for printing, it’s better to take them in RAW format.
It will allow you to adjust the color temperature and fix exposure later.
RAW images contain all the information that you need to edit them.
In some cases, it might be better to shoot photos in JPEG since they take up less space and can be processed more quickly.
Photographers usually take wedding and event photos in JPEG.
It allows them to capture many images in no time.
Tip: If you need to edit many files to send them to your clients or publish them online, you can quickly enhance RAW files with the help of Photoshop’s batch processing features and convert them to JPEG.
To do it, select a required format, click Convert and save your photos in another format.
Transfer and Manage Your Images
First, you need to save photos to your device from the memory card.
Then, make sure to rename the images and organize them so that you can find them at any moment.
To make it easier to find them, you can add convenient metadata tags.
Tip: To optimize your photographer workflow, make sure to edit images in such photo editing software as Lightroom because all image information will be stored in a database.
It will make it easier to find your photos more quickly.
To open RAW images in Lightroom, go to File — Import Photos and Video or drag a folder to the Lightroom window.
Then, you will see an import window.
In the middle of this window, you will see all the photos and videos that are stored in selected folders.
If you don’t want to import some photos to Lightroom, uncheck them.
You can zoom in on a photo by double-clicking on it.
Edit and Optimize Photos
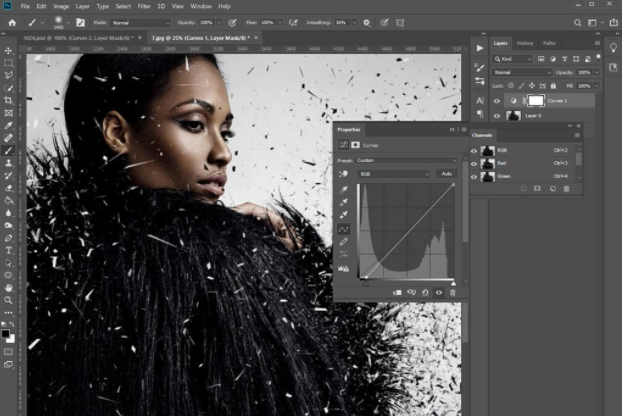
Next, you can enhance your images by adjusting Levels, Image Crop, Sharpness, White Balance, Exposure, Shadow/Highlights, etc.
You can use non-destructive image editing techniques in Photoshop to edit and save layers, adjustment layers, and smart objects.
If you need to resize your images and convert them to various formats, you can use in-built tools.
With them, you can also add text and various graphics to your photos.
If you are a beginner and don’t have loads of photo-editing experience, you can contact a professional service, such as WeEditPhotos.
They have a team of professional retouchers who will quickly enhance your photos of properties, portraits, landscapes, weddings, products, etc.
Tip: To improve your digital photo workflow, try using Photoshop actions, that are suitable for all kinds of photos.
With them, you can tweak colors in your photos, make colors look more saturated, enhance skin tones, and fix lighting issues.
Back up Your Images
While many people omit this step, it allows them to keep your information safe.
You need to create three copies of each file.
Besides, you can use several data backups, such as External Hard Drive, DVD, Blu-ray Disc, Online Storage, etc.
Make sure to create a backup of your Lightroom catalog.
This way, you can save the information on how they were organized.
Tip: If you lost your photos, you can use dedicated data recovery software.
For instance, you can use Stellar Photo Recovery, Systweak Photos Recovery, or Piriform Recuva.
Publish to the Web
Lightroom has integrated features that allow you to publish images on Flickr, Smugmug, Facebook, and other popular websites.
If you have a website or blog where you want to publish your photos, you need to start by exporting them to the format that you need to use.
You can print images by yourself if you have a printer.
There is no need to export them from the photo editor that you use since most of them allow you to print images directly and have all the necessary tools that allow you to prepare images for printing.
Tip: To publish files online, use images that are no larger than 50-90kb.
The easiest and the most reliable way to optimize your image is to use the Save For Web feature in Photoshop.
After opening a photo in Photoshop, go to the File menu and select Save For Web & Devices.
You will open the image in a new window with many adjustment options.
BONUS
After optimizing your digital photography workflow, you will waste less time on tedious tasks.
It will allow you to spend more time on things that you enjoy doing.
Many photographers use this tutorial to make their workflow more effective:
- Copy all the images from a camera to your device;
- Select the best pictures from a photo session;
- Copy these photos to a flash drive. It’s better to use several backup options;
- Upload the selected photos to an online backup platform. Add tags and rename photos so that you can find them later;
- Use only licensed software for processing your photos. Make sure not to use pirate copies;
- When editing your images, you can align and crop them, fix distortion, adjust exposure and white balance, perform color correction, raise contrast;
- After editing your images, upload them to a photo-sharing website.